Showing posts with label What's Cookin'?. Show all posts

Saturday, April 2, 2011

Texas Taco Salad


I like salad. I like tacos. I love it when you mix up the two concepts and end up with a huge bowl of this sweet and tangy deliciousness. This is a perfect meal to throw together when you are short on time or when you need to feed a crowd without too much fuss. If you follow my ingredient amounts, you will easily have 8 servings...Big Man had 2 plate fulls, I had 1...and maybe another half *winks*, and the two big girls ate a half plate each...this left me with another full plate for the next day's lunch and there's still probably 3 more plates to dish!). There are many versions of a taco salad...here's mine...I'm a bit partial to it. Go figure. I promise...you won't be sorry with this one.

Ingredients
1 head of leaf lettuce
1 bag spinach leaves
1 pound browned hamburger
1 envelope taco seasoning
1 medium tomato
1 can black beans, drained
1 can corn, drained
white corn tortilla chips
Catalina dressing
1 C. Shredded cheddar cheese


First, chop the head of leaf lettuce and place in a large salad bowl. Empty the spinach into the same bowl. This is a good time to have your hamburger browning. It takes less than 5 minutes to get your hamburger all ready for the salad.


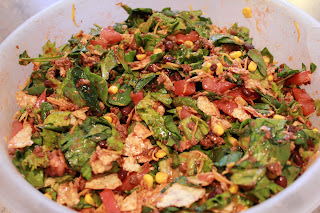
Next, dice the tomato and toss into the salad bowl. Pretty, huh? Very Christmas-y...


Hey, hey...Getting ready to toss in some more color! Open the cans of black beans and corn, drain and rinse with cold water. Allow to drain completely before adding to the salad.


By now, your hamburger is browned. There's really no way to take a picture of ground beef to make it look delicious. Don't you agree? Steak, now that is something you could show me and I'm salivating for a big 'ol sirloin. Medium rare. Please and thank you! Anyhow, back to the ground beef...add the envelope of taco seasoning and blend.


Dump...yes, I said "dump"!...your hamburger in with the salad. At this point, there are so many pretty colors layered on top of eachother, you're gonna want to give it all a little toss. Go ahead, thrill yourself, I won't tell!


Oh, this is my favorite ingredient! Catalina dressing...yum. *wiping the drool off my chin* How much you put in your salad is up to you and your taste preferences. Some people like a little dressing and others are like me and Big Man...you want a little salad with your dressing. *smirks* I usually use about 3/4 of the bottle. To be safe...add what you think you'll like...mix it up, and then take a taste. You can always add more to your liking!


Got kids? This is a great step for them. Have you ever been grocery shopping...the cart is full, and you wait to pick up the bread and chips last? Why do we mothers do this? You got it...we want them to arrive at home intact, with no dents or craters. Next time, have no worries about the kiddos smooshing the chips...you'll want them to for this recipe! Throw a few handfuls of crushed tortilla chips into the salad.


You're almost there. I know, your stomach is already growling at you, demanding you feed it. Mix in a cup of shredded cheddar...and..."ding, ding, ding!"...dinner's ready!


I like to make some grilled cheese triangles using tortillas and white American cheese to serve with this dish. Super simple. Top your salad with sour cream and guacamole if you like...and me likes! Enjoy!

Monday, December 13, 2010

Pizza Pasta

One of my favorite OAMC (once a month cooking) recipes is pizza pasta. It is so easy, not to mention cheap, to make. Very few ingredients are needed to throw together a healthy and hearty meal sure to please the entire family. Hey, if I can get my 3 year old and 2 year old to eat it, anyone will! I've asked some of my adorable family members to help me out for this tutorial...here we go!


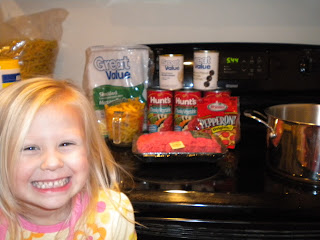
You will first need to gather your ingredients. Here, I've pictured everything you will need to make 4 pizza pastas (if using 8x8 pans, which I do for my family). Please note that you will actually need 4 cans of sauce...one decided to lag behind during the photo op. *oops* Isn't that the cutest 3 year old toe head you ever saw?!


M'kay. Start off by browning your hamburger. This is a little over 1 pound of meat. The great thing about this dish is that you can increase, add, or omit any ingredients you don't care for...just like pizza. Gotta love it! While you are browning your meat, in a large pot, boil enough water to cook 12 cups of rotini. The pasta is cooked al dente (to the tooth) in about 10 minutes.


While your hamburger is browning and pasta is cooking, open all cans (drain any juices) and prepare your "toppings". If you get a darling daughter and hunky husband to do this step for you, your meal will taste that much better! *winks* Cut your pepperoni into bite size pieces...we buy a package of pepperoni slices, so they get cut in half. I leave my mushrooms as they are in the can...the front of the can reads "mushroom stems and pieces". My aunt gave Robert and I a handy dandy chopper from Pampered Chef as a wedding gift...it gets used to chop the olives into bits.


Drain your pasta in the sink and let it sit while you move on. Now that your hamburger is browned, it's time to dump the sauce and all your "toppings" into the empty pot (your pasta is draining in the sink at this point). Ooh, look...already it's looking delicious.


Stir everything together and then start adding your pasta back in. At this point, I had to ask Lillie to let me do the work...the pot couldn't even hold all the pasta. Hopefully you have a larger pot than I do. *shrugs and rolls eyes* I have to mix in what I can and transfer some into a large bowl with the remaining rotini and stir...this happens a couple of times until it's all mixed together (I know, get a bigger pot already...that would be too simple). You can see what happened to the camera when I took over. *smiling* Lillie told me it was time for her to take pictures for the "blob"! So proud...a Martha, Betty, and Rachel in training.


Once everything is all mixed together, it's time to dish up your servings. Tonight we planned to eat the pasta, so I dished out a meal into an 8x8 pan and stuck it into my preheated oven (350 degrees). The rest is in this HUGE bowl and will be rationed into freezer bags that I've labeled with the contents and date...


As you can see, I sqeezed out all the air in the bags, sealed them, and then flattened them out. Yep, that's three whole meals stacked on top of each other. Once you pop these in the freezer and they freeze, you can store them upright (think bookshelf style) to save space! It always feels good to know that there are some "go to" meals in the freezer for busy nights when there just isn't enough time to put a meal on the table. When you practice OAMC, you do have time to offer a home cooked meal! *getting off soapbox to continue with my tutorial*


You cook the pasta in the oven until it is heated through. I usually stir every 10 minutes to ensure the pasta doesn't dry out. The dish will start to bubble when it's almost done...that means it's time to sprinkle on some mozzarella cheese. Pop the pasta back in the oven just long enough to melt the cheese. That's it! You're done! I like to sprinkle a bit of red pepper flakes on mine once it's plated. I never put it in the dish prior to cooking since we have youngins', but if you don't have to worry about giving anyone heartburn...go ahead...put it in there! Time for dinner! Enjoy!

Ingredients (4 8x8 dish meals)
12 cups uncooked rotini
1 pound hamburger
4 large cans spaghetti sauce
1 can mushrooms
1 can olives
1 package pepperoni
1/2 cup mozzarella cheese

Preparation
Boil water in large pot. Cook rotini for 10 minutes. Brown hamburger in skillet. Drain pasta and let sit while putting sauce and toppings into empty pasta pot. Stir toppings together. Add pasta. Bake in a 350 degree oven until heated through and starting to bubble. Add cheese and place back into heated oven until melted.

Directions For Using Frozen Meal
Thaw in refrigerator overnight or place in microwave to defrost on low setting until pasta will remove from freezer bag. The colder the pasta is when placed in the oven, the longer it will take to heat through. Keep stirring every 10 minutes until done and ready for cheese.

Saturday, December 4, 2010

Hey Good Lookin...

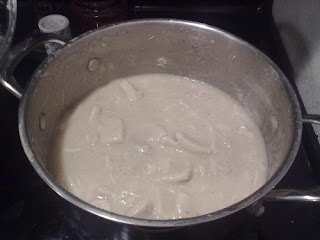
Whatcha' Got Cookin'? Well, tonight the Martha, Betty, and Rachel *hopes you get the associations* burst from my pores as I slaved in the kitchen from 3:30 to, well, now...9:07! The weather is cold and that means a hot pot of homemade chicken and dumplings in my household. Yes, I make it all from scratch! *beaming with pride* Just check this out...


It didn't stop there. Oh no, sir. What's better than chicken and dumplings on a cold night?


That's right...homemade cinnamon rolls! I haven't made these in ages, and I tried a new recipe. Let's just say if you love Cinnabon, I've mastered them!


Oh yes, that's rich cream cheese icing...again, homemade (surely you are drooling on your keyboard by now, right?)


YUM! Look...even baby Audrey has her tongue sticking out ready to inhale that large lump of deliciousness (not to mention sugar, carbs, and fat...but who's worried 'bout that?)