Showing posts with label Dollar Tree. Show all posts

Wednesday, March 16, 2011

"Egg"cellent Easter Tree


Easter decor in my home is scarse. I may be ready for a new house, but that's no reason to just give up on decorating the one I am fortunate to have right now. Therefore, I shopped my favorite place (yep, Dollar Tree) for some treasures to be unveiled. Here's what I managed to find and throw together for less than $6 bucks...


Needed Supplies
foam cone (I made two)
easter grass
small foam decorative easter eggs (these were egg ornaments I removed the hanger from)
foam decorative easter eggs on a stick
wooden thread spool, candle stick holder, etc (to be the base of your tree, if you want one)
paint (if you have a base for your tree and want to color it)
glue gun
spray adhesive


I totally went at this project without any instruction or inspiration. It came together as I went. Originally, I planned to cover the entire cone with the smaller eggs, but when I got the easter grass layer down I loved the look of it. So, I went with this plan...


If you are going to put bases on your trees, give them a couple coats of paint and let them dry while you paint the foam cones. I chose to color the cones, first because I didn't originally plan to have them be covered so heavily in easter grass, but more so because I thought the bright white would peek out more than the easter yellow would (regardless of the covering). At this point, with my materials still wet from paint, I whipped out the blow dryer and sped up the process. Hush now, I'm impatient.


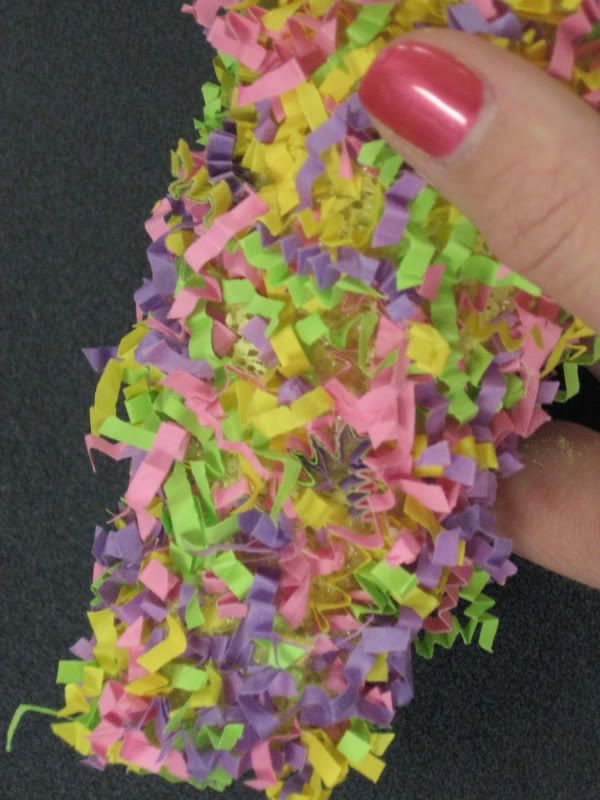
The next step was to cover the trees with the easter grass. I fluffed the grass all up before gluing it down. Why? I don't know. Probably because it's been a dreadfully cold and snowy winter here in Missouri and I haven't ran my hands across any grass in months! Back to the project. Remember, I thought a thin layer was where I would stop, and then put eggs all over the tree. Here's what one layer looked like...  
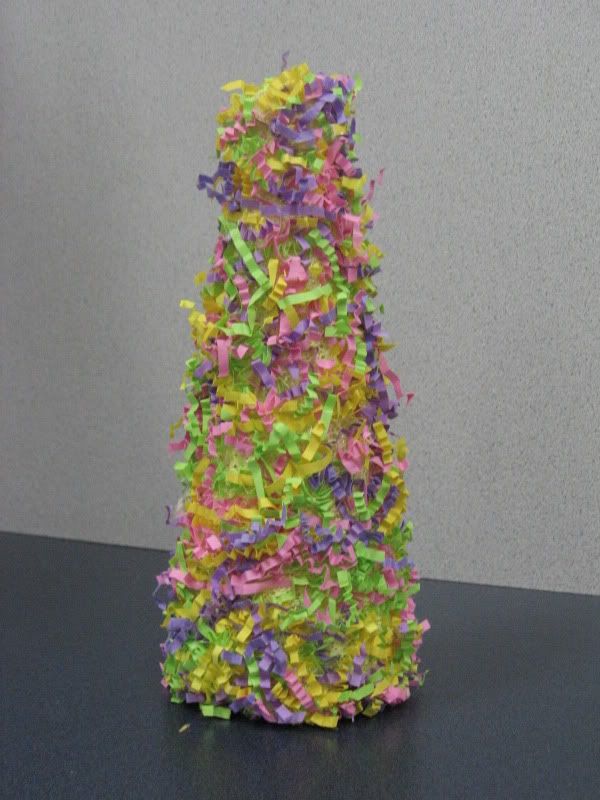
                                                                     
See? See the easter yellow paint peeking through? That would have been fine if I would have went with my original plan. I quickly realized when I started mapping out the egg placement, that I wanted a different look. This is when I decided to add a couple more layers of the grass and omit the all over egg look. I trimmed off any scraggly grasses before each additional layer. Yes, scraggly is a word. No, don't bother looking it up. Just trust me! By the third layer, the grass was very small and fine because it was what was being trimmed off the previous layer. Because of this, I used spray adhesive for the second and third layers of grass.

Once the grassy tree was done, I started placing toothpicks into the eggs and sticking them into the base. I picked out two of the larger eggs that were already on sticks, and poked them through the top. The last step of the project was to glue the tree to the base that I had painted white. A lovely pair of "egg"cellent Easter trees! 


If you re-create this project or one similar, please share a post or link up!

Monday, March 7, 2011

Aye, It's a Wee Green Wreath

You have to love the Irish. While studying abroad in Sweden during my college years, I was fortunate enough to make great friends with two lads from Ireland. Luke and Jerome. Way too much fun! Aye, they could down their pints. Cheers to you Luke and Jerome, on this fine St. Patrick's Day that nears...


Absolutely every part of this wreath (ok, except the scrap fabric I used to wrap the wreath form) came from my "place"...The Dollar Tree. It's the first place I look for materials when I've got a project in mind. Ok, ok...maybe that's because there's no Hobby Lobby or Michael's here in the 'Burg. If there were, Robert would buy stock in the companies just so he could recoup some of the money I'd spend. Back to my "place", it's where you will find the necessary materials to work up your own festive St. Patty's decor.

Materials Needed
wreath form
fabric to wrap the form
green mix curling ribbon (I bought 4 of the pre-curled packages of 3 present toppers)
white curling ribbon (again, 4 of those pre-curled packages)
wooden St. Patrick's day sign
glue gun

My apologies for not taking pictures for a tutorial. This project was done with my gal pals during a craft get together. The final product is all you get. I'll walk you through it though...super simple. First, wrap your form with the fabric and secure at the beginning and end with your hot glue. Separate all the ribbon bunches from the paper backing, but leave them stapled. Now, randomly glue the bunches down on your form. Yes, of course I made marks all the way around...trying to be even with my measurements. Do you have to be obsessive like me? Absolutely not! That would be crazy of you. Leave the neuroticism to me. Now that all of your curling ribbon is glued, you'll want to mix and fluff your ribbons together. There's no method to this. It's like tousling your hair...just mix and fluff until you love the way it looks. I plan to go back and glue down some of the curls or use an adhesive spray to "set" the look because a day with a slight breeze, and some curls are now hanging down more than I'd like. Whether or not you do this step is totally your call. The last step is to add a hanger if you desire and hang the wreath over your wooden sign. A quick, budget friendly way to add in some St. Patrick's day decor to your home. Cheers!

If you make one of your own St. Patrick's Day wreaths like mine or similar, please share by posting a picture or linking up!